Warning: Please make sure you proceed to test-runs and analyses of the results file before you launch your experiment.
PennController is an IBEX module providing standardized methods to create dynamic pages for your experiment.
This page describes how to install it in IBEX. For more details on each subcomponent of the module, see the corresponding Element page of the wiki.
Installation
1. Create a new* project on Ibex Farm
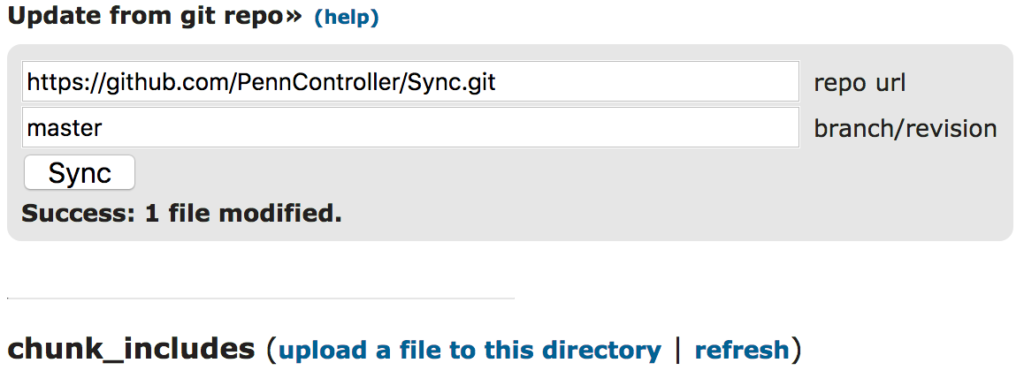
2. Enter https://github.com/PennController/Sync.git under Update from git repo
3. Click the Sync button

4. Click experiment.html link at top to try it out
5. Edit example_data.js under data_includes to modify the experiment
Alternatively, simply upload the PennController.js file under js_includes in your Ibex project.
Use
PennController works in par with the standard IBEX syntax. Since an example is worth a thousand words, here is the content of the example_data.js file of this IBEX experiment:
[js try=”data”]
PennController.ResetPrefix(null);
PennController.AddHost(“https://www.w3schools.com/tags/”);
PennController(
newText(“instructions”, “Please look at the image below and click on the button”)
.print()
,
newImage(“smiley”, “smiley.gif”)
.print()
,
newButton(“validation”, “Validate”)
.print()
.wait()
);
PennController(
newText(“instructions”, “Please press any key to start playing the soundfile”)
.print()
,
newKey(“anyKey”, “”)
.wait()
,
getText(“instructions”)
.remove()
,
newAudio(“horse”, “horse.mp3”)
.play()
.wait()
,
newText(“thanks”, “Thank you for listening”)
.print()
,
newButton(“finish”, “Click here to finish”)
.print()
.wait()
);[/js]
Some explanations
The code above defines two trials. What is between the parentheses of the PennController function defines the unfolding of the trial. The first trial above contains three blocks separated by commas. Each of those blocks creates an element. The first block creates a Text element (newText) called instructions with the text Please look at the image below and click on the button. The next line (.print()) has the effect of adding the text to the screen. The second block creates an Image element (newImage) called smiley, using the image smiley.gif (hosted at the URL provided to PennController.AddHost above). The next line (.print() again) has the effect of adding the image to the page, which already contained the text added in the first block: so far, the page displays the text and the image below it. The third block creates a Button element (newButton) named validation with the text Validate. The next line (.print() again) adds the button to the page. The page now displays, from top to bottom: a line of text, an image and a button saying Validate. The next line (.wait()) has the effect of waiting for a click on the button. When the button is clicked, the end of the first trial is reached and the screen is cleared.
The second trial is a little more complex. The first block again creates a Text element, named instructions, and adds it to the page. The second block creates a Key element (newKey) named anyKey, not associated with any specific key in particular (''). The script remains on the line .wait() as long as no key is pressed: at this point, the screen only shows the instructions message, and the display stays like that until a keypress happens. Once a keypress happens, the third block removes the instructions message from the screen, and the fourth block creates an Audio element (newAudio) named horse using the file horse.mp3 (again, hosted at the URL provided to PennController.AddHost). The next line, .play(), starts playing the audio, and the line after that (.wait()) waits until the playback has ended. Meanwhile, the display remains clear of any element, since the instructions message has been removed earlier. Once the audio is done playing, the fifth block displays a thanks message saying Thank you for listening onto the screen, and the sixth block displays a finish button below the message, saying Click here to finish: the message and the button below it are now the only things visible on the screen. The script remains on the last .wait() until the button is clicked, at which point the end of the second trial’s script is reached: this is the end of the second trial and the screen is refreshed.
For more detailed explanations, read the notes on PennController's ontology.
Index
- Installing PennController
- Ontology
- Aesthetics
- Preloading resources
- ZIPped resources
- Spreadsheet (CSV)
- Canvas creation
- Setup for audio recordings collection
- Commands by element categories
- Standard Element Commands
- Audio element
- Button element
- Canvas element
- Function element
- Html element
- Image element
- Key element
- Scale element
- Selector element
- Text element
- TextInput element
- Tooltip element
- Timer element
- Var element
- Video element
- VoiceRecorder element
- Youtube element
- Special clear command
- Special end command
- Global PennController Commands
- PennController
- PennController.AddHost
- PennController.AddTable
- PennController.CheckPreloaded
- PennController.DownloadVoiceButton
- PennController.FeedItems
- PennController.Footer
- PennController.GetTable
- PennController.GetURLParameter
- PennController.Header
- PennController.InitiateRecorder
- PennController.PreloadZip
- PennController.ResetPrefix
- PennController.Template